 |
Set up Logic, Samplitude and Cubase
for use with the DIGI32 Series
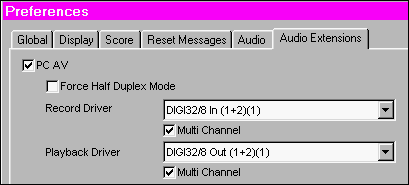
Logic will not recognize the DIGI's correctly as long as it can't test the card on startup of Logic. Because of this using the DIGI32/8 the button 'Check Input' in the driver's settings dialog has to be unchecked.
In general we recommend to feed valid input signals to the cards before starting Logic (first start up your other devices/hardware, then startup the PC and Logic.) The first time configuration is easy to explain, we will use a DIGI32/8 as example. In the menu 'File' choose 'Preferences', then 'Audio Extensions'. Ensure that everything is set up like shown in this picture.
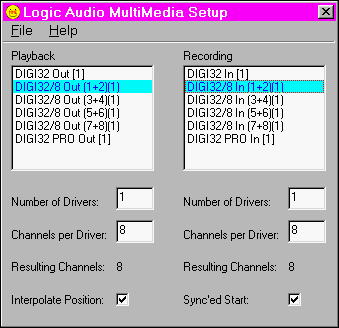
Shut down Logic and start 'MME Setup'. This
program allows to check whether Logic's entries in to the registry were
right, and - in case they are not - to change them. Ensure that everything
is set up like shown in this picture.
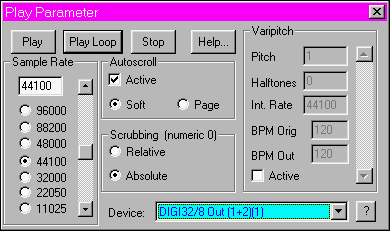
Samplitude 2496 and Studio 4.5 for Windows 95 Both programs are easy and fast configured to your needs. Open a (new) virtual project with the desired number of tracks. The playback and record window allow to choose the used device.
Multitrack recordings will be configured using the R and M buttons left to the tracks.
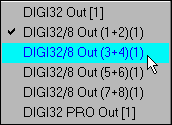
The easiest way is to right click on the R button for record and P button for playback. A drop down list allows to directly select the desired device.
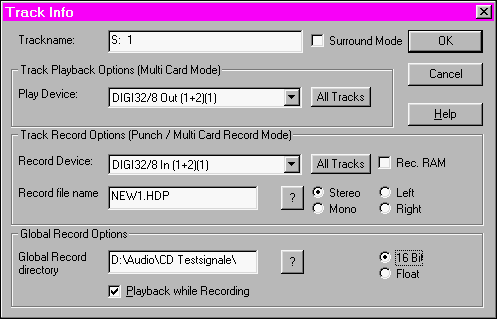
Use the left mouse button to set up each track with its corresponding input and output device.A click on the question mark will open a track info window as shown below. Here the same configuration plus some extra definitions are available.
Please note that as long as the button 'Multi Card Mode' is not pressed only the device set up in the Playback window (press key P to open) will be used. When using more than two tracks Samplitude will automatically mix all tracks down to two (to open the mixer press the M key.) With 'Multi Card Mode' pressed all tracks will be played back using the devices set up to the left of the tracks (see above.) Using the DIGI32/8 and not having pressed 'Multi Card Mode' all tracks will be played back as 2-channel mix and SPDIF. With 'Multi Card Mode' pressed the card switches to the ADAT mode and plays back 8 channels separate over the lightpipe.
This makes it very easy to switch between both modes and two different kinds of monitoring.
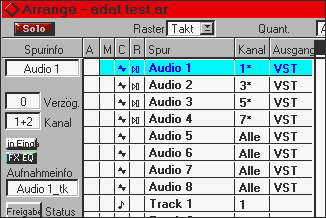
Cubase VST 3.553 for Windows 95 This is a little bit more work, so take some time. The first thing to do is to activate the Multi-Recording. If this is not active Cubase will not record more than 2 channels at once.
Thereafter an entry in the table marked R (Record) appears, that allows to activate more than one (stereo) track for record.
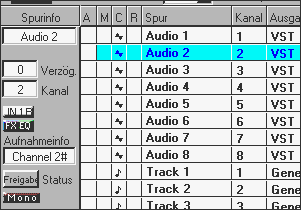
If you want to record 8 mono tracks click on the stereo button to switch the corresponding track to mono. The track has to be empty else it will not change its state!
Next choose 'Audio', 'System',' ASIO-control' and 'Advanced' to reach the setup of the soundcard. Cubase already includes a preset for the RME DIGI32/8. In case the PC used is a real horse power machine you may lower the settings of the buffer size from 4096 samples to 2048. The lowest setup can be verified using 'Test audio buffer and sync'. But do not make them too low, as the machine might tend to crackle on audio then.
Before closing the 'System' dialog please have a look at the choices for the monitoring. As long as Cubase is running the settings in the settings dialog of our driver are disabled, the monitoring behavior is defined exclusively here.
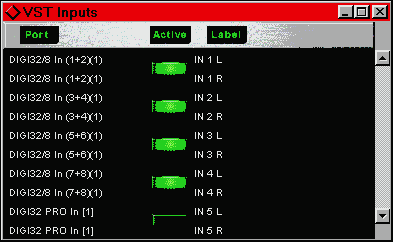
Use the menu 'Audio' and 'Inputs' to open the Input window. When using the DIGI32/8 activate - like shown to the right - all 4 stereo pairs. As Cubase lets the record device open all the time it might be helpful to uncheck the 'Check Input' option in the settings dialog of our driver.
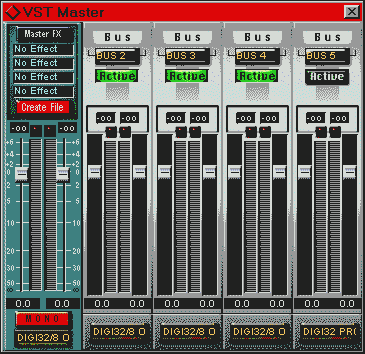
Use the menu 'Audio' and 'Master' to open the Master window as shown below. There you will find as many busses as devices were activated before in the ASIO-Control. In case of a 8 track playback with the DIGI32/8 click and hold the buttons at the bottom to assign the bus outputs to the stereo pairs of the DIGI, for example Master - DIGI32/8 (1+2), Bus 2 - DIGI32/8 (3+4) and so on. Next activate the busses by clicking once on the 'Active' button.
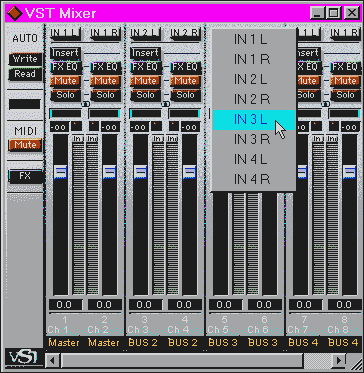
Finally (yes...) use the menu with 'Audio' and 'Monitors' to open a window named 'Mixer'. Here you have to assign the inputs to the channels. Press the CTRL-key and left-click on the button at the top of this window. A list of all assignable inputs appears, please set them up one after another from 1L to 4R as shown in the picture. At the bottom of this window the mixer signal is routed to the busses (same as the master.) Left click on the button 'master' to define all channel outputs as shown in this picture.
Copyright Matthias Carstens, 1998. |
Copyright © 2002 RME. All rights reserved.
RME is a registered trademark. |


